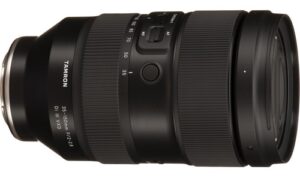
The lens sweet spot is the aperture of your lens that produces the highest possible quality in sharpness. It’s common that photographers think the wider apertures, like 1.4 and 2.8 would be the sharpest of a lens. It’s not true. In fact, typically the sharpest aperture is 2 to 3 stops smaller than the widest. In this video, you’ll learn how to find the lens sweet spot of any of your lenses, and fine-tune its sharpness to your camera body. I’ll share a tool and software that will make the job painless for anyone.
Transcription was done by Descript‘s automated transcription services which means it’s an AI-generated transcript. The transcript may contain spelling, grammar
So you got a new lens for your camera and you want to make sure you’re photographing it at its absolute, sharpest possible quality. Now, no matter the type of photography you do, whether it’s landscape or, or products or portraits, whatever it is, you want sharp photos. In this video, we’re going to talk about how to find your lens sweet spot quite easily. Hey, this is Scott Wyden Kivowitz, a storyteller with a camera talking about all the things photographers like you and I are thinking about in this video we’re going to talk about the Lens Sweet Spot bought the Lens. We spot is kind of been this sort of like hidden passion project of mine. You know, I experimented with a website all about lens sweet spots and made some nice connections and relationships through it. And, uh, eventually it, it wasn’t, the website itself wasn’t that popular, so I just shut it down.
However, it is a popular search term. So I know that, that you’re watching this because you’re curious about it. So I’m glad that I’m able to help you to pinpoint how to get your lens sweetspot. Now, why do you need find your lens sweet spot, so you might have a lens like a one point four, one point eight, two point eight Lens, whatever it is, and you might photograph at those apertures and that might be fine for some situations, especially low light or if you want that heavy, you know, shallow depth of field, but the problem with that is your lens is not its sharpest at those very, you know, wide open apertures, those tiny numbers, those shallow depth of field. While it might be buttery, smooth with the background and everything to be blurry, it’s not ideal for sharp photos. Now this is especially true if you’re using a macro lens.
If you have a macro lens that’s two
You could have five 35 millimeter lenses and five Nikon, d850 bodies. They will all at different the same if they were candidates the same if they were so nice and so on. That is why the manufacturers include lens corrections inside of the bodies that you can
Basically zero and this plane are on the same focal length. Now this isn’t made a cardboard. It’s not made of any cheap materials that are going to bend or Warper, you know, things like that. It’s actually made of quite durable for of plastic type materials. It even has a tripod socket on the bottom so you can put it on a tripod and level it as you need or put it on a flat table. So I’m going to switch around and set this up so you can actually see how to go about this perfectly. Here we go. First things first. Let’s get a tripod plate on the bottom of this so I can align it. Now I am not screwing it in super tight. I’m just doing it by hand. It’s not like I’m moving it around and stuff. It’s going to be quite still. Now you can see that a gut, the lens line, you know, sort of horizontal lined up.
All I need to do now is sort of tilt the camera and make sure that it is perfectly and we’re actually going to move this in. I want to be able to get this as close as possible so that we can do some arranging. All right, so right now if you look, you can actually see the red behind here. Now that is the main target. We want to also get the macro target aligned as well. To get the macro target aligned, he might have to do a little tilting on this side. Now this is not perfectly level only because, oh, I didn’t level it. Let’s do that.
Okay, so right now we could actually see red in both of these holes. Now you can’t see the read 100 percent, but the red is peeking through. So I am satisfied. I know that this will be extremely precise. Now the only thing that we have to do is to photograph, you know, capturing that, you know, circle, and we photograph at every aperture, the lens offers. Now, right now I am using the 24 to one slash 20 Nikon f four lens and I am zoomed all the way to 1:20. Let me show you what 24 looks like now. I could do it at 24 as well if I really want to. I could do it at 24 as well and maybe I will. But for the sake of this video, I’m going to show you it zoomed in all the way. So we are ready to go at 120 millimeters and I am going to show you what it looks like, how we would do this if we were actually taking pictures along the way.
Now of course I’m not going to be taking pictures as I do the video, but you will get the idea. So here we are at a four. I would then close up an aperture. Now we’re at four point five, now we’re at five, now we’re at five point six and you can see the video is getting darker and that is because I am photographing video and the uh, the ISO is up as much as it can go. That is what I’m allowing my camera to go for. Video, auto, isl, six point three, seven point one and so on. Me Open back up to f four. So I would basically do that all the way to have 22 and just have a whole bunch of photos. The next step would be to review all these photos to see which one is actually the sharpest and actually focused on zero, not front focusing and not back focusing.
Now you could do this manually or you could use software also made by Michael tapes called focus tune, and by doing that you import all the jpegs from these photos of jpegs of these photos. You import it to the software, it analyzes it and tells you exactly which is the sharpest. Now, once you have that all set and done, everything is completely done. You can then go into your camera and set this specific lens to either plus one plus two, whatever it is, minus one minus two. Whatever your results come up as, you can fine tune your camera for that Lens, but what else is really cool is it can tell you the software and also your. Your testing will actually tell you which aperture is the sharpest for your Lens. That’s pretty neat, right? So not only are you going to calibrate your camera to your lens to make sure it’s extremely sharp, but you’re also going to find out just naturally, which is the sharpest know.
Typically your lens sweet spot is about two to three stops more than your widest aperture. So if you have a two point eight lens, your Lens sweetspot might actually be around the four to five point six range. Really depends on the Lens, how it’s made, how the optics are and so on. If you have a one point four, one point eight Lens, then your lens sweet spot is going to be most likely somewhere between two point eight and a for now that’s just like sort of a sort of guide and overview in over guy, whatever you wanna call it general. But if you want to get true accurate results, then you need to do real testing with a well calibrated chart and system that you can ensure it’s absolute sharpness and alignments and, and, and whatnot with quality materials. And ideally use the software that go with it.
Now I have to say, um, I didn’t mention that length. We spots were sort of a, a, a, a project of mine a couple of years ago. And I do want to say thank you to Michael Tapes. We had a really great conversation when I was starting that project, I actually had to lend the line and he actually supplied me with the mark two version of the London line, so I was able to upgrade to it and I also use his focusing software and it’s just amazing. I’ve used it on all of the camera bodies that I’ve owned and currently own and will continue to use it on all future bodies and lenses because it’s just that powerful and that precise. If you like this video, click that subscribe button below. Now I publish new videos every Monday and Thursday whenever possible. You don’t want to miss it. There’s also a bell button. If you click that, you’ll be notified when I have a new video, so that’s pretty cool too, right?


