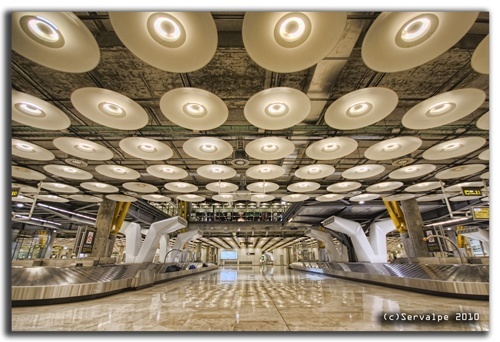
I want to share with you a tip for handheld exposures. I have a Canon EOS 450D and this camera can shoot at 3 fps, that it is not very fast and it is easy to have a little movement between exposures. What I do to resolve the problems with alignment is to use ‘Merge to HDR Pro’ in Photoshop CS5 to select one of the exposures with the Ghosting removal tool included (besides PS generates less noise). I usually select the 0 EV or -2 EV, which is the best exposure when you may have had camera shake and to be sure that the exposure time is less than 1 / (equivalent focal length). After selecting 32 bits mode, I save the result as an .exr or .hdr file. Finally, I load this file in Photomatix and do tonemapping.
Photo by Sergio Valverde. View more photos on Sergio’s Flickr page. Sergio can also be found on Twitter @servalpe
Thanks for reading and happy shooting


Hi
I am often confronted by situations where a tripod is forbidden such as churches or monuments etc. I can usually find a steady place like a wall, ridge, railing, post, ledge to steady my camera. As I use a Nikon D90, I usually shoot -2, 0, +2EV and at 3FPS. This faster shutter the better. If I end up with ghosting I can take care of this with PhotoMatix Pro V4 deghosting feature.
Here is an example inside St Peter’s Basilica – a No Tripod Zone
https://tinyurl.com/2bj8wob
Regards, Erik
Thanks Scott for the guest post. I want to add some additional info to this tip, that maybe it can be useful. Another additional setting in the camera for low light situations is to set the camera to AUTO ISO. If you do that, the the camera selects for each exposure the best shutter speed to avoid camera shake and the lowest possible ISO to have no so much noise.
My best regards,
Sergio
i’m still trying to understand why this is better or preferable to generate the HDR image from a single exposure, in Photoshop, then taking it into Photomatix for tone mapping instead of just doing it all in Photomatix
It’s not necessarily better to create a HDR image from a single exposure. It is all preference… what works best for you.
i tried it, taking a single image into ps5 hdr and saving it as 32 bit HDR image and opening that in photomatix v3.0. PS5 does a nice job of dealing with eliminating ghosting and the single image based 32 bit HDR image opened in and tonemapped in photomatix worked quite nicely.
Then i discovered the new selective de-ghosting function in photomatix v4 and concluded i can achieve the same results by creating an hdr of the single frame directly in photomatix v4 including selective de-ghosting.
I am a big fan of the new feature in Photomatix
The reason to use PS to generate HDR files is that generates so less noise and you get more details than using Photomatix. Photomatix is worst with alignment and the ghosting tool sometimes generates black halos.